Centerboard work

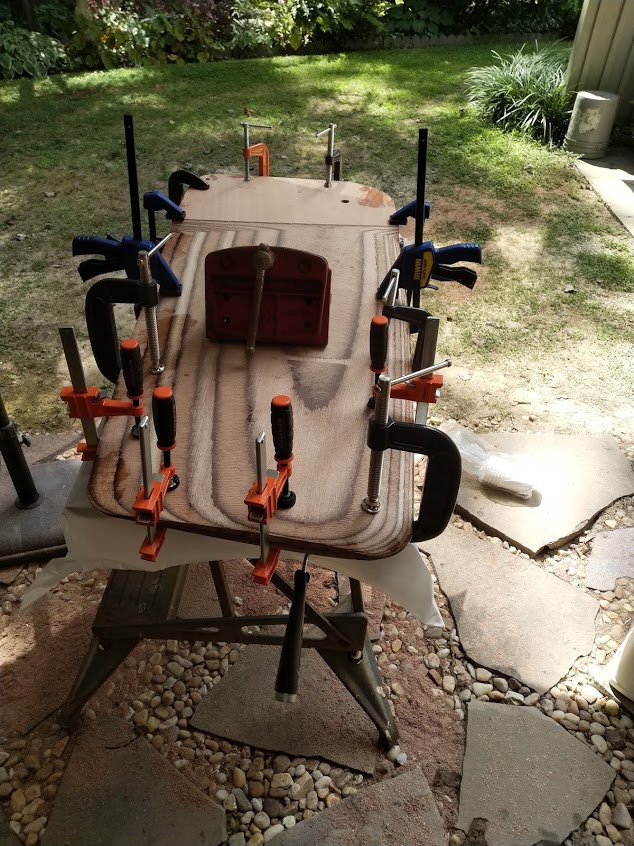
Finally got started on the centerboard.

Routed out both halves to enclose the 22 lb steel plate, then coated both surfaces with epoxy before installing the plate.

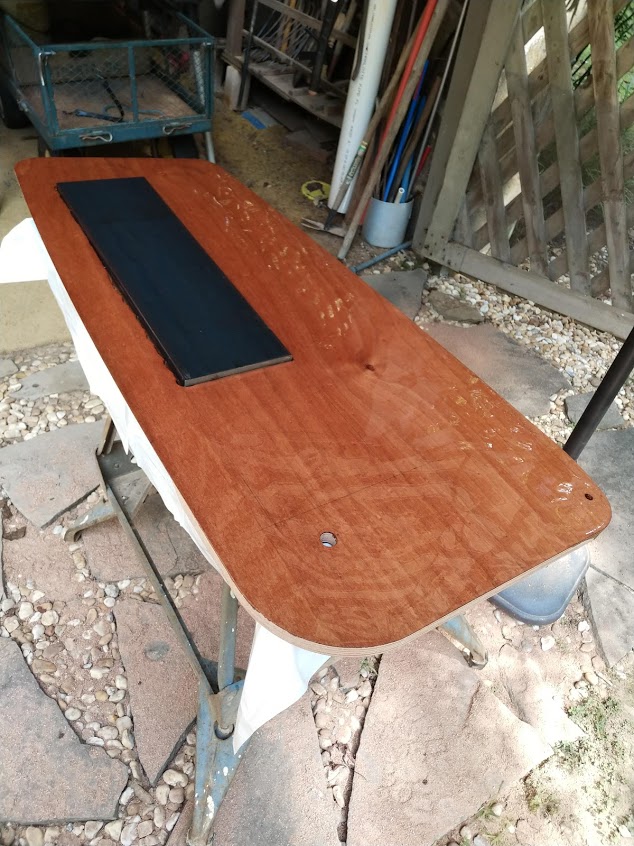
Then I glued both halves together with copious amounts of epoxy and clamps. Not too much pressure with the clamps, as I didn’t want to squeeze out all of the glue. Epoxy does better when not glue starved.

Note the sawdust from the previous routing session. I need more clamps. Really.

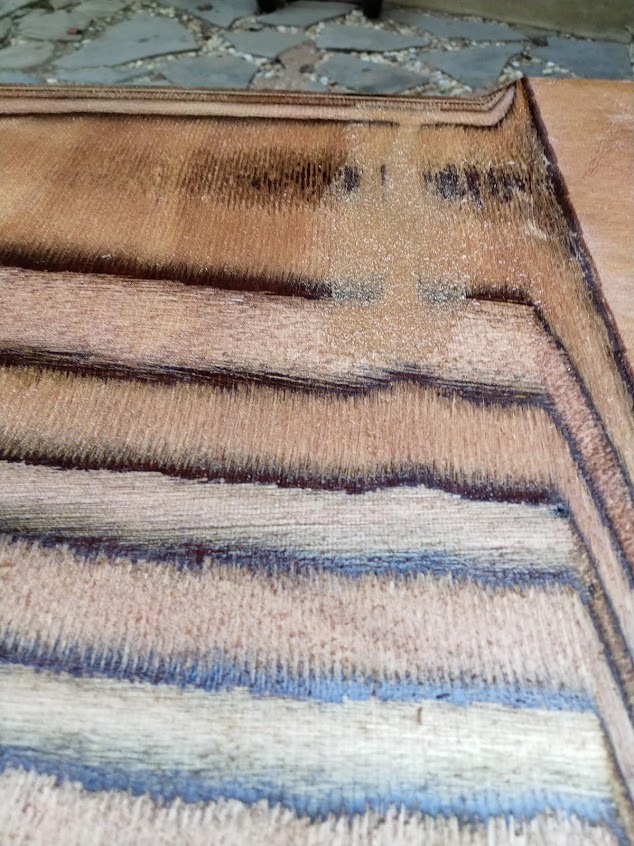
I bought the centerboard and rudder pre-cut and shaped, but the CNC machine didn’t raise the cutter up high enough when transversing across the foil, so I got to try out mixing epoxy with wood flour. This was smoothed over the trough, and didn’t run out.

I couldn’t leave the void as the fiberglass wouldn’t dip down there completely, leaving an air filled void – not good on something constantly underwater – that void will attract water, and then rot out the centerboard.

Finally (for now), I coated both exterior sides with a coat of epoxy. When I get back to this I’ll apply two layers of 6 oz. fiberglass and quite a few more layers of epoxy.

Becalmed

The Artful Sailor isn’t kidding about cheap sailmaker’s palms.

Utterly useless. A proper one is on order.

I did get the main panel of the ditty back cut out, with folds creased in, strike lines marked, twine threaded and waxed. The bench hook is even hooked. That’s about all I can do, other than cutting out the other pieces, but I’ll wait on that until I need them.

The strike lines look off, but that’s just parallax from the camera angle.

The Ditty Bag

From The Artful Sailor and Whole Earth Nautical Supply in Port Townsend, WA, a fantastic ditty bag kit.

n.b. the smell of the contents should be bottled as a cologne.

Now, I learned of this project reading Emiliano Marino’s column in Small Craft Advisor magazine – do subscribe – and also reading his book, The Sailmaker’s Apprentice.

Armed with the book, and the kit (which also includes the instructions from the book and two SCA articles), I’ll be starting on this project this weekend. The sewing skills acquired should cover my needs in making a sail for the SCAMP. That’s the idea, anyway. I’ve decided a crinkly dacron sail won’t be a good match for this boat.

If you too are interested in jumping into a similar adventure, check out their web site https://www.theartfulsailor.com/ It is full of great information. Better yet, if you find yourself in the Port Townsend area, do make a pilgrimage to the store.

SCAMP

Alexis begrudgingly sharing the sofa with the boat plans.

Sail #443, once I have a sail, which will come after I have a boat, which will come after I start ordering parts. I have the centerboard weight. Next will be the centerboard and rudder pieces, and epoxy/fiberglass to glue them together. And graphite powder for the centerboard.

That will start later this Summer, and can be done here in the condo. The rest will be built elsewhere over the next few years.

Bread/Brick Baking

Brick shaped bread

Well, it’s one way to get rid of flour. This was the second batch of bread. The first batch never made it into the oven.  These loaves rose too much, and much too quickly, catching me off-guard. It still tastes good, just a little too tiny for sandwiches.

My first mistake

Note the inked in correction. The first rule of baking bread is to never measure by volume, only by weight.

I got cavalier. My King Arthur 200th anniversary cookbook only lists things by volumes, and everything I’ve baked from there has turned out just fine, regardless of the humidity or type of salt. I was going through those recipes, then grabbed this book of sprouted wheat flour recipes.  This is the simple recipe, with commercial yeast, not home nurtured wild beasts.

I had not tried this recipe before, and simply mixed the ingredients by volume. I poured in 3-1/4 cups of water (did I mention I’m not a morning person? Did I mention this was in the morning?) and noticed instantly that I had a bowl of flour soup. But “..the dough will thicken while it rests” – not that much.

I then went to the publisher’s site looking for an errata sheet for the book. Nope. Then I went to Amazon and read the reviews, and there it was, a review noting this very typo. I poured the dough into the trash can.

So, I tried again, with the corrected measurement. I weighed everything else, just to be safe.

Well, it worked this time, except it rose really well. Too well, and checking on it 10 minutes before I “needed to”, I found it already too high.

Well into the oven they went, and sure enough, they fell to less than half of their pre-oven size. Sigh.

Some days just aren’t for baking. But it tastes good.